Setup in 4 steps
You need two minutes in ERPNext to create an API key. The rest needs no technical skills.
1 · Create an API key in ERPNext
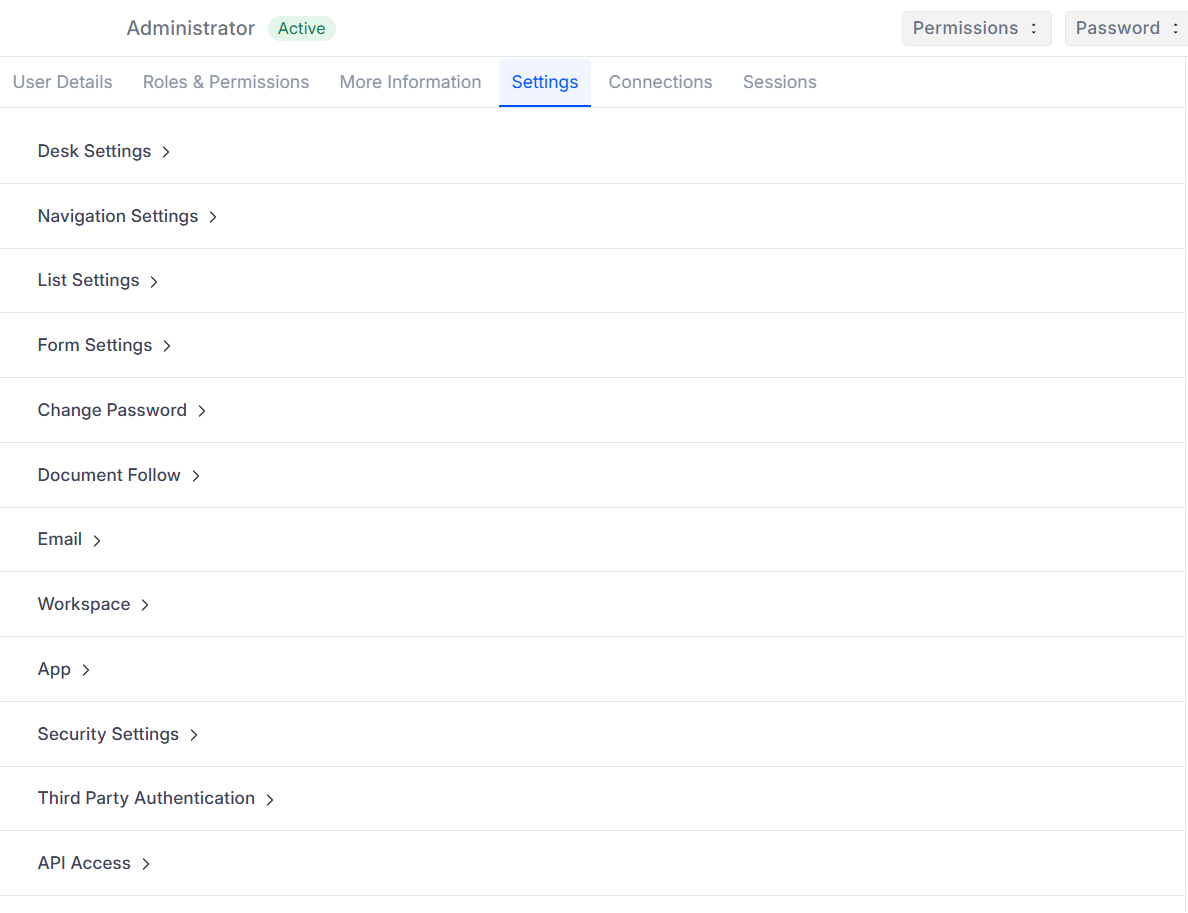
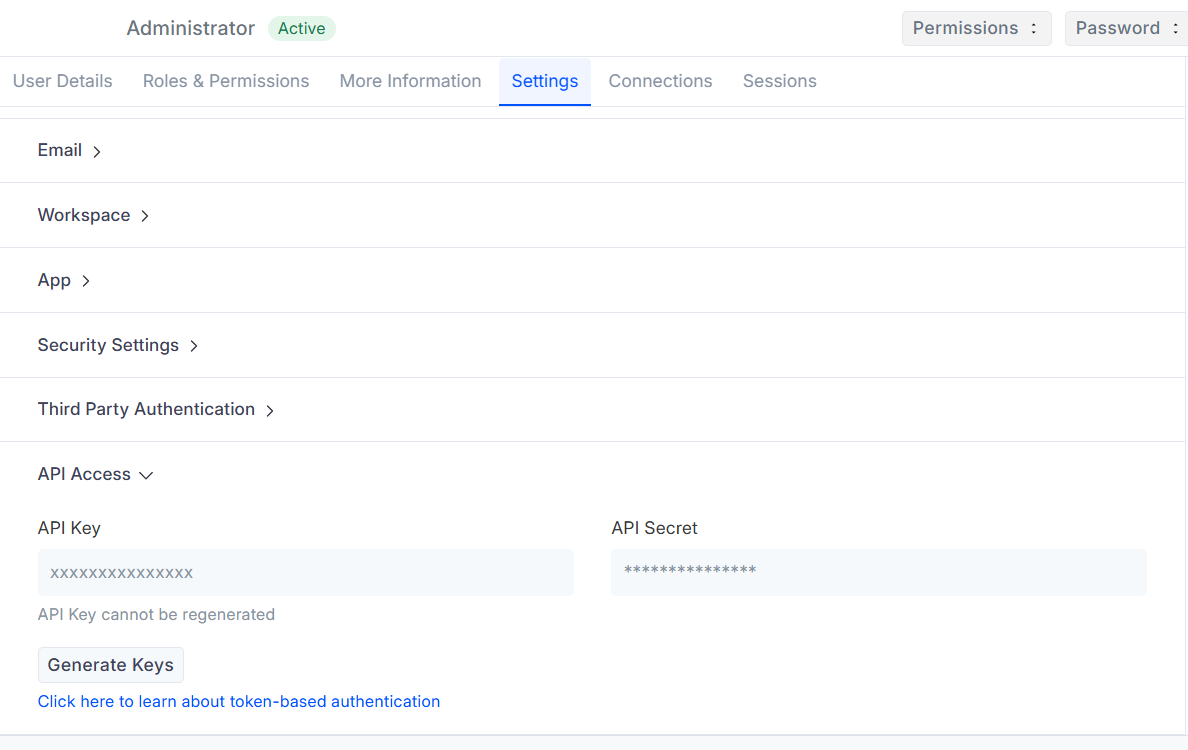
In ERPNext, open the search (Ctrl+K) and type User → open the user list → click the user you want → the Settings tab → the API Access section (the last one on the page; click its heading to open it) → Generate Keys. A window shows the API Secret: copy it right away, it is shown only once. The API Key stays visible in the same section.
- The key acts with the roles of the user it belongs to, so create it for a user with the Accounts User role, plus Sales, Purchase and Item roles for what you want to use.
- A System Manager can generate the key for any user from the Users list. A user made just for the connector is best.
- Keys do not expire. Clicking Generate Keys again cancels the old secret, so save the new one on the Account page.
- Works with ERPNext on Frappe Cloud or on your own server, as long as the address is reachable from the internet over https.
The key and secret are the permission to read and write in your system — share them with nobody; you will save them only on our site, and they are stored encrypted.
1. The Settings tab of the user page: sections are folded, API Access is the last
2. Open API Access and click Generate Keys, then copy the secret from the window that appears
2 · Add the connector in your AI app
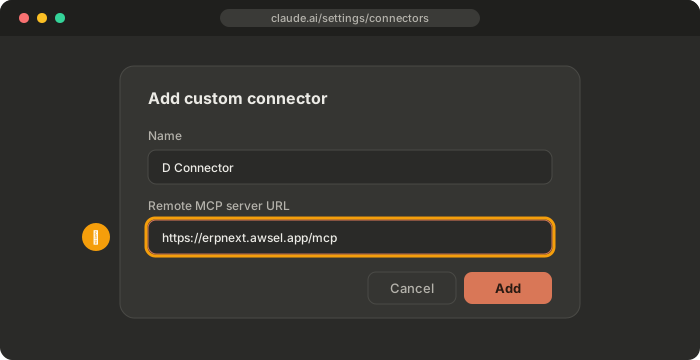
Copy this link:
https://erpnext.awsel.app/mcp
- Claude: Settings → Connectors → Add custom connector → paste the link → Add.
- ChatGPT: turn on Developer mode in settings, then add the link as an app.
3 · Sign in and save the connection
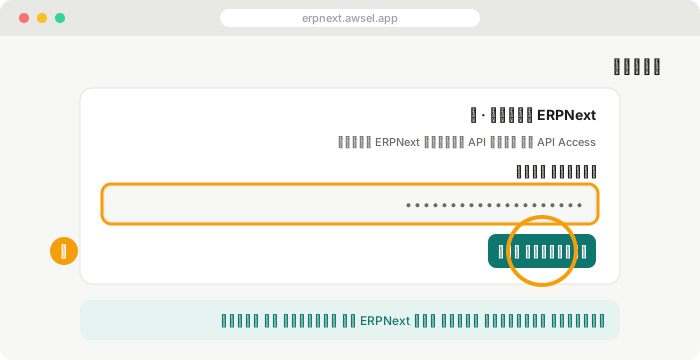
Your AI app opens our page: continue with Google, enter your ERPNext address (like
https://mycompany.frappe.cloud) and the key and secret from step 1, and click Allow. We
verify the key against your ERPNext before saving it, and it is stored encrypted.
4 · Send your first document
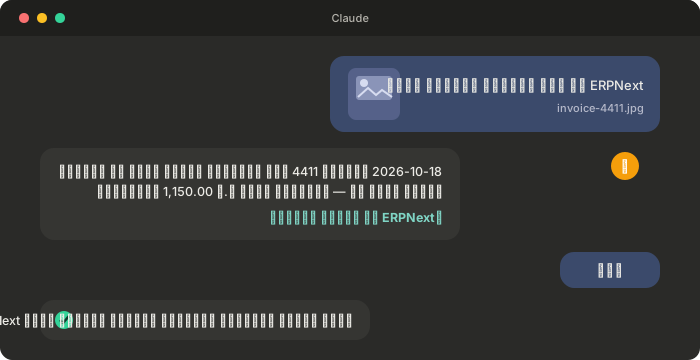
In the chat, send the invoice photo and write, for example: "Enter this supplier invoice in ERPNext". It shows you the summary first; after your yes it is saved as a draft in your system, and your team submits it in ERPNext as usual.
More messages that just work
- "Create a draft sales invoice for Horizon Co. with these lines".
- "Did we already record invoice 4411 from Al-Noor Co.?"
- "Find the supplier Modern Electricity Co. and show me its address and tax number".
- "What are the latest unpaid purchase invoices?"
Menu names in AI apps can change. Your AI app may need a paid plan for custom connectors. Stuck? See the FAQ or write to sales@mea-is.com
Not affiliated with Frappe Technologies · Part of the Awsel family · Privacy · Terms · sales@mea-is.com